The History:
Potstickers, also called Jiaozi, are Chinese dumplings, and very similar to Japanese Gyoza, and apparently the Nepali have their own version with lots of spices. (Next time...) According to the ever-helpful Wikipedia, potstickers were invented by a famous practitioner of Chinese medicine, Zhang Zhongjing, who used them to treat frostbitten ears. (I'm not kidding. And I'm not really sure HOW they prevent frostbite. Do you apply them to the ears? Does the mere act of eating them prevent the affliction? Unsure. Thoughts?) Luckily, New Haven was a sultry 68 degrees today so frostbitten ears were not the purpose for today's culinary experiment.
The Process:
I consulted about 15 food blogs to figure out how to make potstickers, most seemingly written by Chinese-American women following very strict rules from their mothers on the ideal potsticker recipes and cooking techniques. At first, I was intimidated- it seemed that so much could go wrong! But after my success with pasta, my confidence was bolstered and I felt prepared to tackle a seemingly elaborate dish. One particular blog laid out the process really well, and if you tackle potstickers (which you should! You'll never go back to the Trader Joe's version!) I recommend taking a look at her description and pictures of the process, although I encourage you to invent your own filling (I don't eat pork or shrimp, so I used her filling recipe as a guide.) Potstickers turned out to be really easy, though messy. (It seems like everything I make is messy- maybe it's just me.)
The Recipe:
There are three components to this dish, and each recipe is really simple, requiring very little in the way of measurement. (Hooray!)
The wrapper: Combine about 1.5 cups of flour with enough warm water to form a dough, plus a little salt. Knead until mixed, then set aside to relax and let the gluten do its thing.
The filling: We mainly eat vegetarian, so I used a brick of firm tofu (I love the local brand, Bridge Tofu- it's amazing what a difference fresh tofu makes!), crumbled. I added diced green onion, cilantro, a ton of ginger, garlic, some diced snow peas and shredded carrots, a handful of frozen spinach, a sprinkling of chili flakes, a splash of sesame oil and soy sauce, and a scrambled egg (to hold it together when it cooks). Mix, set aside. You can make filling with ground pork or raw shrimp, chicken, or egg, and/or add your favorite vegetables (most recipes called for Napa cabbage but we didn't have any, but some sort of crunchy vegetable is ideal.)
The sauce: Mix together any of the following ingredients in your soy sauce: fresh ginger, garlic, cilantro, green onion, sesame seeds, sesame oil, lime juice, vinegar, chili flakes, honey. Set aside to chill in the fridge.
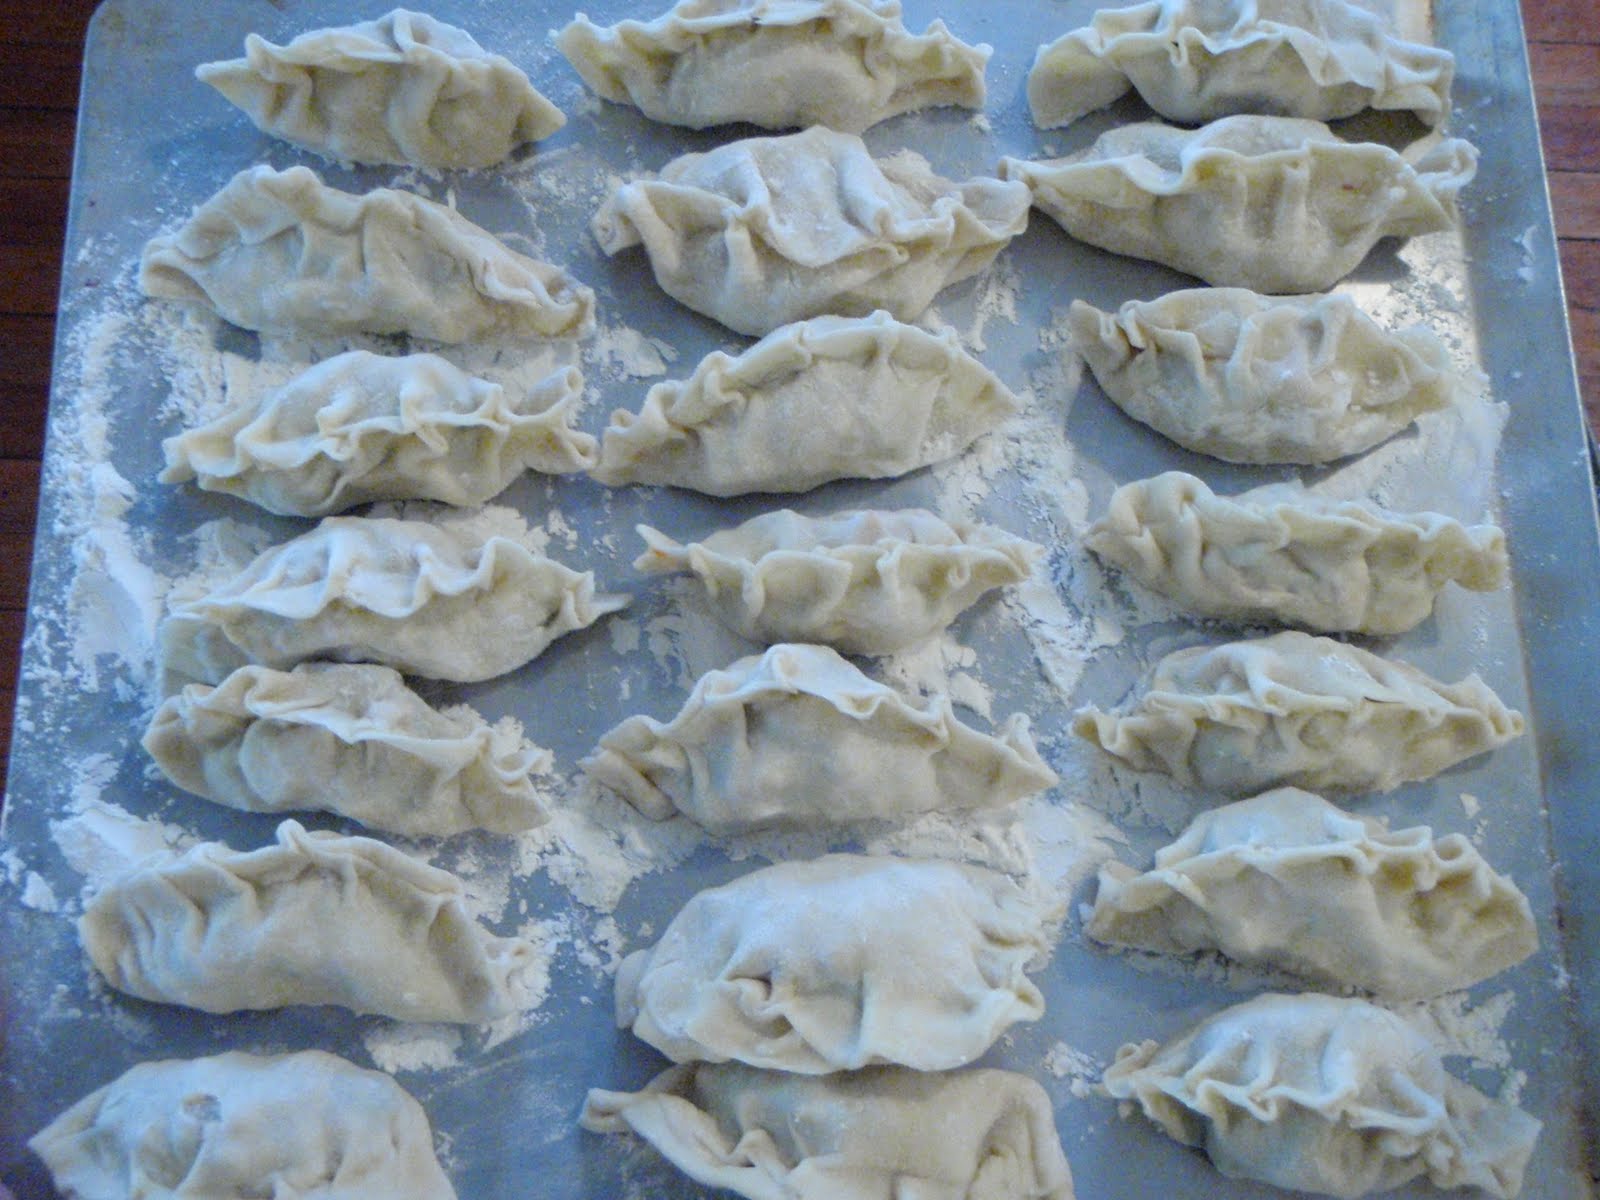
Now, to assemble! Give the dough a few more kneads, then snip off bits about the size of a cherry tomato. Roll each dough bit into a ball, then using a rolling pin (or a wine bottle) flatten the dough into a circle shape, using your fingers to pull the dough until it's a bit larger than your palm. Spoon about a tablespoon of the filling into the center of the dough, then fold the dough in half. At this point, you fold the dough together, pleating as you go. This doesn't need to be pretty (see mine.) It takes about 3-5 potstickers to master the technique. As long as they are sealed all the way around, you'll be fine. Attractive potstickers are a bonus. Place the completed potsticker on a very floured surface. Repeat.*
To cook, pre-heat a very generous splash of oil in a very large frying pan on medium-ish heat, then array the potstickers in the pan, and cook until the bottoms are browned. At this point, very quickly add about a cup of water, then clamp a lid on the frying pan before you get splattered with hot water. They'll steam and continue to cook for about 5-8 minutes. When the water has steamed off, continue to cook them a minute more to allow them to firm up.
Serve with the dipping sauce!
(*If you want to freeze the extras, before you cook, arrange the potstickers so they aren't touching on a cookie sheet, freeze until solid, then place them in a tupperware or plastic bag.)
The Results: These were a HUGE hit. Totally delicious, with a great chewy texture on the outside and full of hot zesty flavor on the inside. At this point, you can probably tell I'm a fan of starchy, soul-satisfying comfort foods (pasta, gnocchi, pierogi...) so I'm not surprised that I loved the potstickers. Will I make them again? Definitely! I'd enjoy trying them with chicken, or mixing up the herbs a bit. Far from being intimidating, they were simple, fun to make, and are a (fairly) healthy snack (or meal, in my case.) They'd also make an impressive food to serve at a party, and would be fun to cook with kids. (Particularly if they are picky kids- they could make their own mixture.) If you make some- let me know how they turn out for you, and let me know what's in your filling!
Cheers!
Sunday, April 4, 2010
Sunday, March 28, 2010
Homemade Pasta (!!!)
(I think I may have found my calling. A whole new world of cooking options has opened up for me!)
The History:
Wikipedia makes pasta sound far more complex and mysterious than perhaps necessary:
"Pasta's origin continues to evoke speculation. While many different cultures ate some sort of noodle-like food, composed mostly of grain, the key characteristics of pasta are durum wheat semolina, with a high gluten content. Furthermore, it is made with a technique that allows the resultant dough to be highly malleable, thus resulting in the many different shapes (i.e., ziti, spaghetti, ravioli) that characterize 'pasta.' ... Historians have noted several lexical milestones relevant to pasta, none which change these basic characteristics."
Lexical milestones? Um, ok. Moving on.
The Process:
Nathan and I anticipated this weekend's activities and ordered this pasta maker from Amazon.com. Pasta recipes abound on the internet, so I had a general idea of how to combine my flour and eggs (from free range, organically fed chickens). Saturday night, we cleared the kitchen counters, poured glasses of wine, and dug in.
I have to say, this is probably the single most fun and satisfying food item I have ever made. Yes- those are strong words. But making pasta is like... well, grown-up Play-doh. But unlike the strange vaguely salty/chemical taste of Play-doh, pasta is mouthwateringly delicious! Making pasta is totally satisfying, allowing one to zone out, knead firm lumps of dough, and roll lengths of dough through a (really fun!) machine, then cut (with gratifying precision) linguini or spaghetti noodles.
Saturday night Nathan and I made about 6 servings of egg linguini and spaghetti noodles, and ate nearly all of it for dinner. Sunday morning I woke up, guiltily glanced at my pile of reading, and headed into the kitchen where I may or may not have made pasta for 5 hours straight. I used up a dozen eggs, countless cups of flour, and experimented with multiple flavors. I think I may be on the way to perfecting my technique. I definitely have a new hobby. (Anyone in New Haven- let me know if you'd like some homemade pasta. It's taken over our house.)
The Recipe:
Pasta and I get along really well, in part because the recipe is so open ended! Add about 1 cup of flour to a bowl, toss in one egg, maybe some salt, and a small kersplash of olive oil, and mix. (Want more pasta? Add one egg per cup of flour.) Add a tiny splash of water if needed. Knead until your stress is relieved (maybe 5-8 minutes?) and set the dough aside to rest for about half an hour.

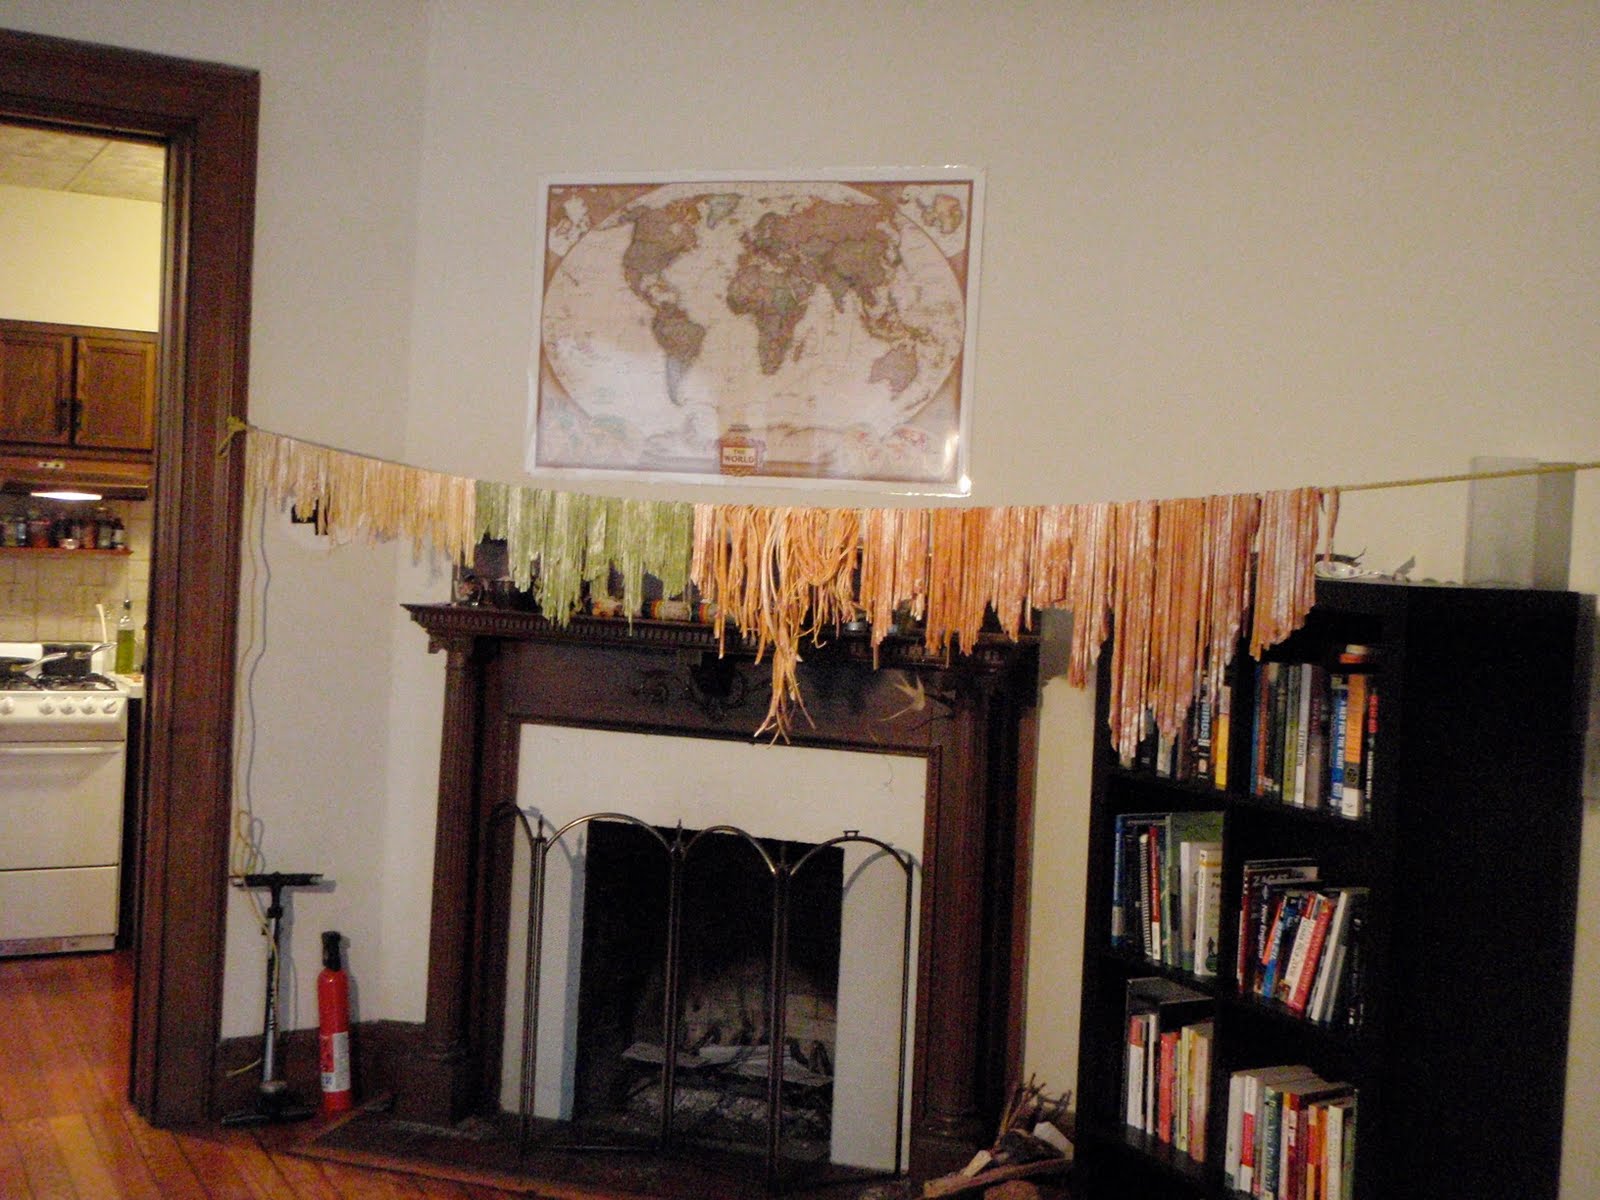
Once the dough has rested, follow the instructions on your pasta maker (supposedly you can make pasta without a machine but let's face it: the machine is the fun part!!). Basically, I took about a egg sized lump of dough, made a plump worm shape, and started running it through the machine, starting at the widest setting and working my way down to the skinniest setting, finally running the lasagne-shaped giant noodle through the spaghetti cutter (see the picture above.) The key, I discovered, is to flour the dough liberally all the way through the process so that the noodles don't stick to each other or to the machine. It took about 5 sets of spaghetti to really get the hang of it- luckily, flour and eggs are inexpensive so you can afford to experiment a little until you get the technique right.
(After our first few batches of 5 foot long linguini (seriously!) we started making more moderate 16" long linguini. But hey- go to town! If long noodles appeal to you, go for it!)
Advanced Pasta Recipe: I got bored fast with the egg dough. It's delicious, for sure, but why stick with egg when you can add flavor! color! texture! I played around all day and found three flavor combinations that provide ample excitement to our pasta:
1. Whole wheat-flax seed: about 2/3 c white flour, 1/3 c whole wheat flour, 1-2 T roughly ground flax seeds, with about 1.5 eggs. This was delicious, chewy, hearty and addictive.
2. Tomato-5 pepper: 1 c flour (a little of this was whole wheat), 1 big tablespoon tomato paste, and a proprietary mixture of spices (a sampling of the many dried peppers we have around the kitchen), plus an egg.
3. Spinach-basil: 1 c flour (a little whole wheat),
1/2 c spinach, 1 egg, sprinkling dried basil. I used the Trader Joe's frozen spinach because it comes pretty finely chopped. This dough was more moist, so I added more flour as I went, and had to knead it a lot more to mix in the spinach.
The Results: I made SO. MUCH. PASTA. Our house is covered in flour and pasta is hanging from every available chair/clothesline. We ate pasta for dinner last night, and pasta for lunch (see below) and are having a friend over for pasta for dinner. It's amazing. Seriously. I can't wait for next weekend to make more pasta!
As a side note, I have to mention my absolute favorite sauce: one large can (28 oz.) tomatoes (diced/whole), one half onion, garlic cloves (optional) and (this is the important part) 2-4 T butter. Put all this in a pot, and simmer for about an hour. When you can't handle the tantalizing scent any more, puree (if you are like me and don't like lumpy tomatoes) and pile in great heaping spoonfuls on top of noodles. Apply parmesan cheese liberally.
Happy eating!
The History:
Wikipedia makes pasta sound far more complex and mysterious than perhaps necessary:
"Pasta's origin continues to evoke speculation. While many different cultures ate some sort of noodle-like food, composed mostly of grain, the key characteristics of pasta are durum wheat semolina, with a high gluten content. Furthermore, it is made with a technique that allows the resultant dough to be highly malleable, thus resulting in the many different shapes (i.e., ziti, spaghetti, ravioli) that characterize 'pasta.' ... Historians have noted several lexical milestones relevant to pasta, none which change these basic characteristics."
Lexical milestones? Um, ok. Moving on.
The Process:
Nathan and I anticipated this weekend's activities and ordered this pasta maker from Amazon.com. Pasta recipes abound on the internet, so I had a general idea of how to combine my flour and eggs (from free range, organically fed chickens). Saturday night, we cleared the kitchen counters, poured glasses of wine, and dug in.
I have to say, this is probably the single most fun and satisfying food item I have ever made. Yes- those are strong words. But making pasta is like... well, grown-up Play-doh. But unlike the strange vaguely salty/chemical taste of Play-doh, pasta is mouthwateringly delicious! Making pasta is totally satisfying, allowing one to zone out, knead firm lumps of dough, and roll lengths of dough through a (really fun!) machine, then cut (with gratifying precision) linguini or spaghetti noodles.
Saturday night Nathan and I made about 6 servings of egg linguini and spaghetti noodles, and ate nearly all of it for dinner. Sunday morning I woke up, guiltily glanced at my pile of reading, and headed into the kitchen where I may or may not have made pasta for 5 hours straight. I used up a dozen eggs, countless cups of flour, and experimented with multiple flavors. I think I may be on the way to perfecting my technique. I definitely have a new hobby. (Anyone in New Haven- let me know if you'd like some homemade pasta. It's taken over our house.)
The Recipe:
Pasta and I get along really well, in part because the recipe is so open ended! Add about 1 cup of flour to a bowl, toss in one egg, maybe some salt, and a small kersplash of olive oil, and mix. (Want more pasta? Add one egg per cup of flour.) Add a tiny splash of water if needed. Knead until your stress is relieved (maybe 5-8 minutes?) and set the dough aside to rest for about half an hour.
Once the dough has rested, follow the instructions on your pasta maker (supposedly you can make pasta without a machine but let's face it: the machine is the fun part!!). Basically, I took about a egg sized lump of dough, made a plump worm shape, and started running it through the machine, starting at the widest setting and working my way down to the skinniest setting, finally running the lasagne-shaped giant noodle through the spaghetti cutter (see the picture above.) The key, I discovered, is to flour the dough liberally all the way through the process so that the noodles don't stick to each other or to the machine. It took about 5 sets of spaghetti to really get the hang of it- luckily, flour and eggs are inexpensive so you can afford to experiment a little until you get the technique right.
(After our first few batches of 5 foot long linguini (seriously!) we started making more moderate 16" long linguini. But hey- go to town! If long noodles appeal to you, go for it!)
1. Whole wheat-flax seed: about 2/3 c white flour, 1/3 c whole wheat flour, 1-2 T roughly ground flax seeds, with about 1.5 eggs. This was delicious, chewy, hearty and addictive.
2. Tomato-5 pepper: 1 c flour (a little of this was whole wheat), 1 big tablespoon tomato paste, and a proprietary mixture of spices (a sampling of the many dried peppers we have around the kitchen), plus an egg.
3. Spinach-basil: 1 c flour (a little whole wheat),
1/2 c spinach, 1 egg, sprinkling dried basil. I used the Trader Joe's frozen spinach because it comes pretty finely chopped. This dough was more moist, so I added more flour as I went, and had to knead it a lot more to mix in the spinach.
As a side note, I have to mention my absolute favorite sauce: one large can (28 oz.) tomatoes (diced/whole), one half onion, garlic cloves (optional) and (this is the important part) 2-4 T butter. Put all this in a pot, and simmer for about an hour. When you can't handle the tantalizing scent any more, puree (if you are like me and don't like lumpy tomatoes) and pile in great heaping spoonfuls on top of noodles. Apply parmesan cheese liberally.
Happy eating!
Wednesday, March 24, 2010
Brazil Edition Follow Up!
Well, I'm back! And, as promised, here is a brief pictorial report of the cuisine I sampled in Brazil.
To begin-if you think the picture above looks like any old grocery store aisle, you're wrong. This photo was taken in one of the biggest grocery stores I've ever been in (some employees wore roller skates to get around faster), and this aisle, both sides, was the yogurt drinks aisle. Not yogurt tubs, squeezables, drinks, and single serve cups, just drinks. It was mind boggling. (I dislike yogurt so I didn't buy any, but was astounded at the selection so I had to snap a picture.)
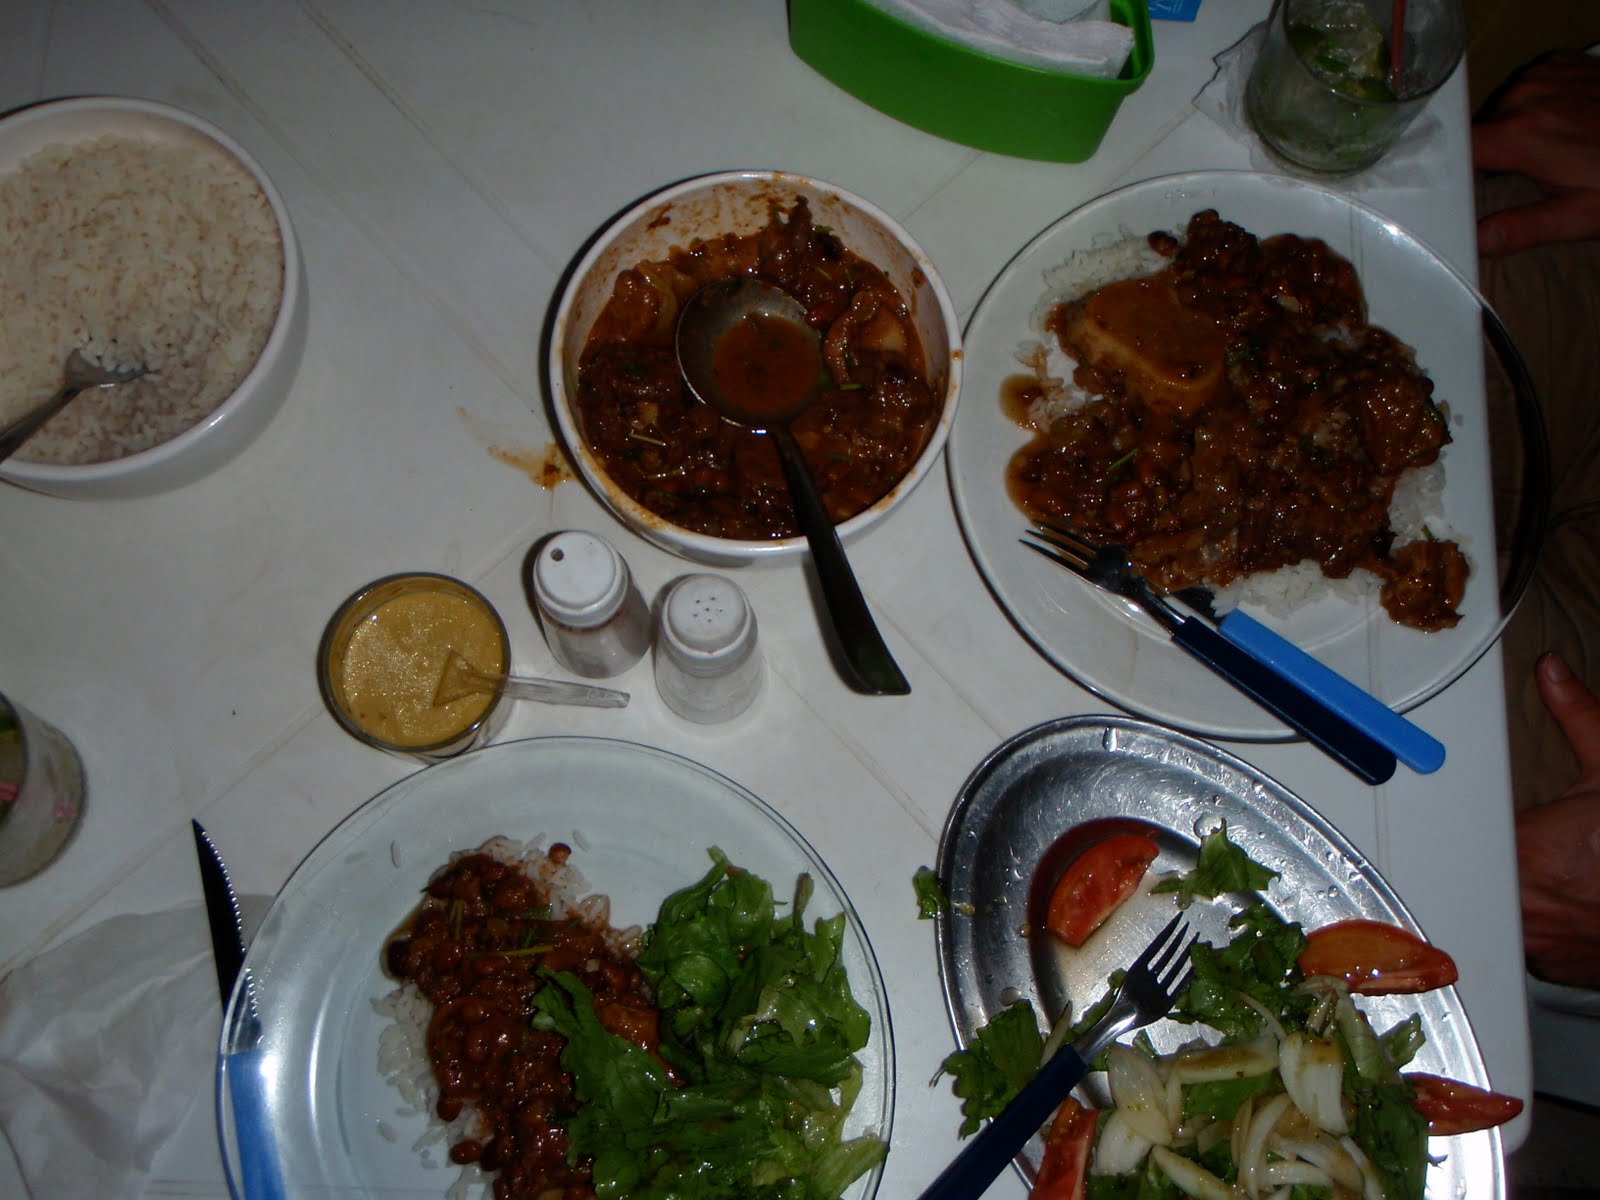
As promised, I tried the Brazilian national dish, feijoada. This dish is a stew made of assorted animals and animal parts, beans, cilantro, and mysterious lumps, served atop rice. Kyle (my traveling buddy) is fluent in Portuguese, and asked the waiter what was in the feijoada. The response was a longish list of animal bits, including tripe. Kyle translated the list back to me, but left the English word for tripe off the list. (Don't worry, I heard it.) I scooped a selection of lumps out of the sauce- beef (I think), pork sausage (I think), but no tripe (which is wobbly and slightly hairy.) The taste was wonderful- spicy and tomatoey and zesty and rich, but a few bites were enough. I would not make this at home, but I did like the homemade hot sauce that came with it and hope to make my homemade hot sauce sometime this week.
Caipirinhas! (Cai-purr-een-yah) The picture above isn't a caipirinha, but rather, homemade cachaca, which is the sugar cane alcohol that is part of a caipirinha. Several bars sold cachaca that was infused with local flavors: vanilla, corn, ginger, cloves, and you could buy a 'dose' (shot) of the alcohol to sip at. I really, really loved the caipirinhas, which were available at every restaurant for affordable prices and were sweet (sugar) and tangy (lime) and simple and refreshing. I have a bottle of plain cachaca and plan to make homemade caipirinhas as the weather warms up, and I brought back some homemade cachaca from "O Cravinho" Bar in Salvador, Brazil that's infused with clove, lime, honey, and ginger -Yum!!
We spent a lot of time on the beaches at Itacare for my third week, surfing, watching the waves, and not doing anything remotely related to school. The beaches were wonderful- clean, white sand, clear water, and a plethora of vendors selling everything from water, coconuts, sarongs and jewelry to coconut cupcakes, beer, fried pastry, and grilled cheese! The cheese is a local cow's milk cheese and looks a lot like feta, but is chewier. It's skewered on a stick, and the vendors (I really liked the vendor in the picture- he was friendly and gave me a thumbs up every time I saw him) grill the skewer over a tiny handmade coal stove that they carry around the hot beach all day. The cheese somehow doesn't drip off or melt, it just turns brown and crispy on the outside and chewy and flavorful on the inside. At the end, the cheese-vendor dips the skewer into a bag of dried oregano and then grills the cheese one last minute. It's a surprisingly satisfying snack!
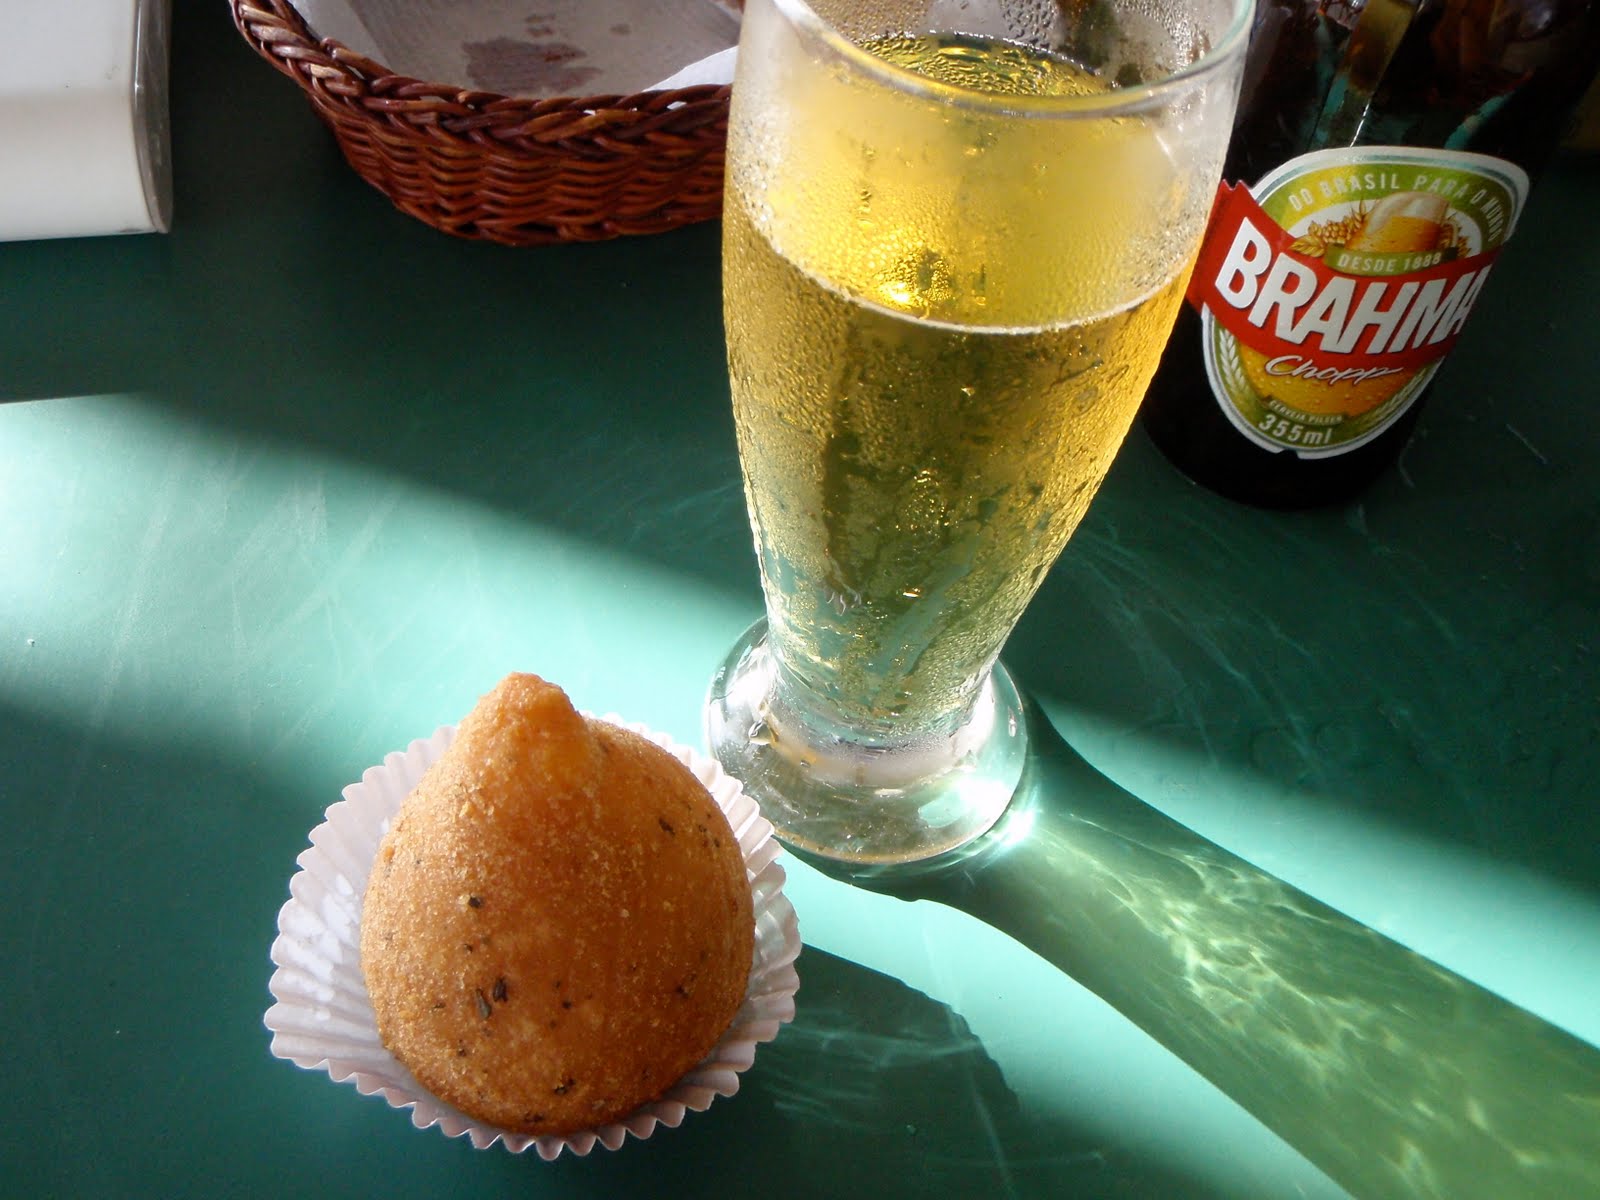
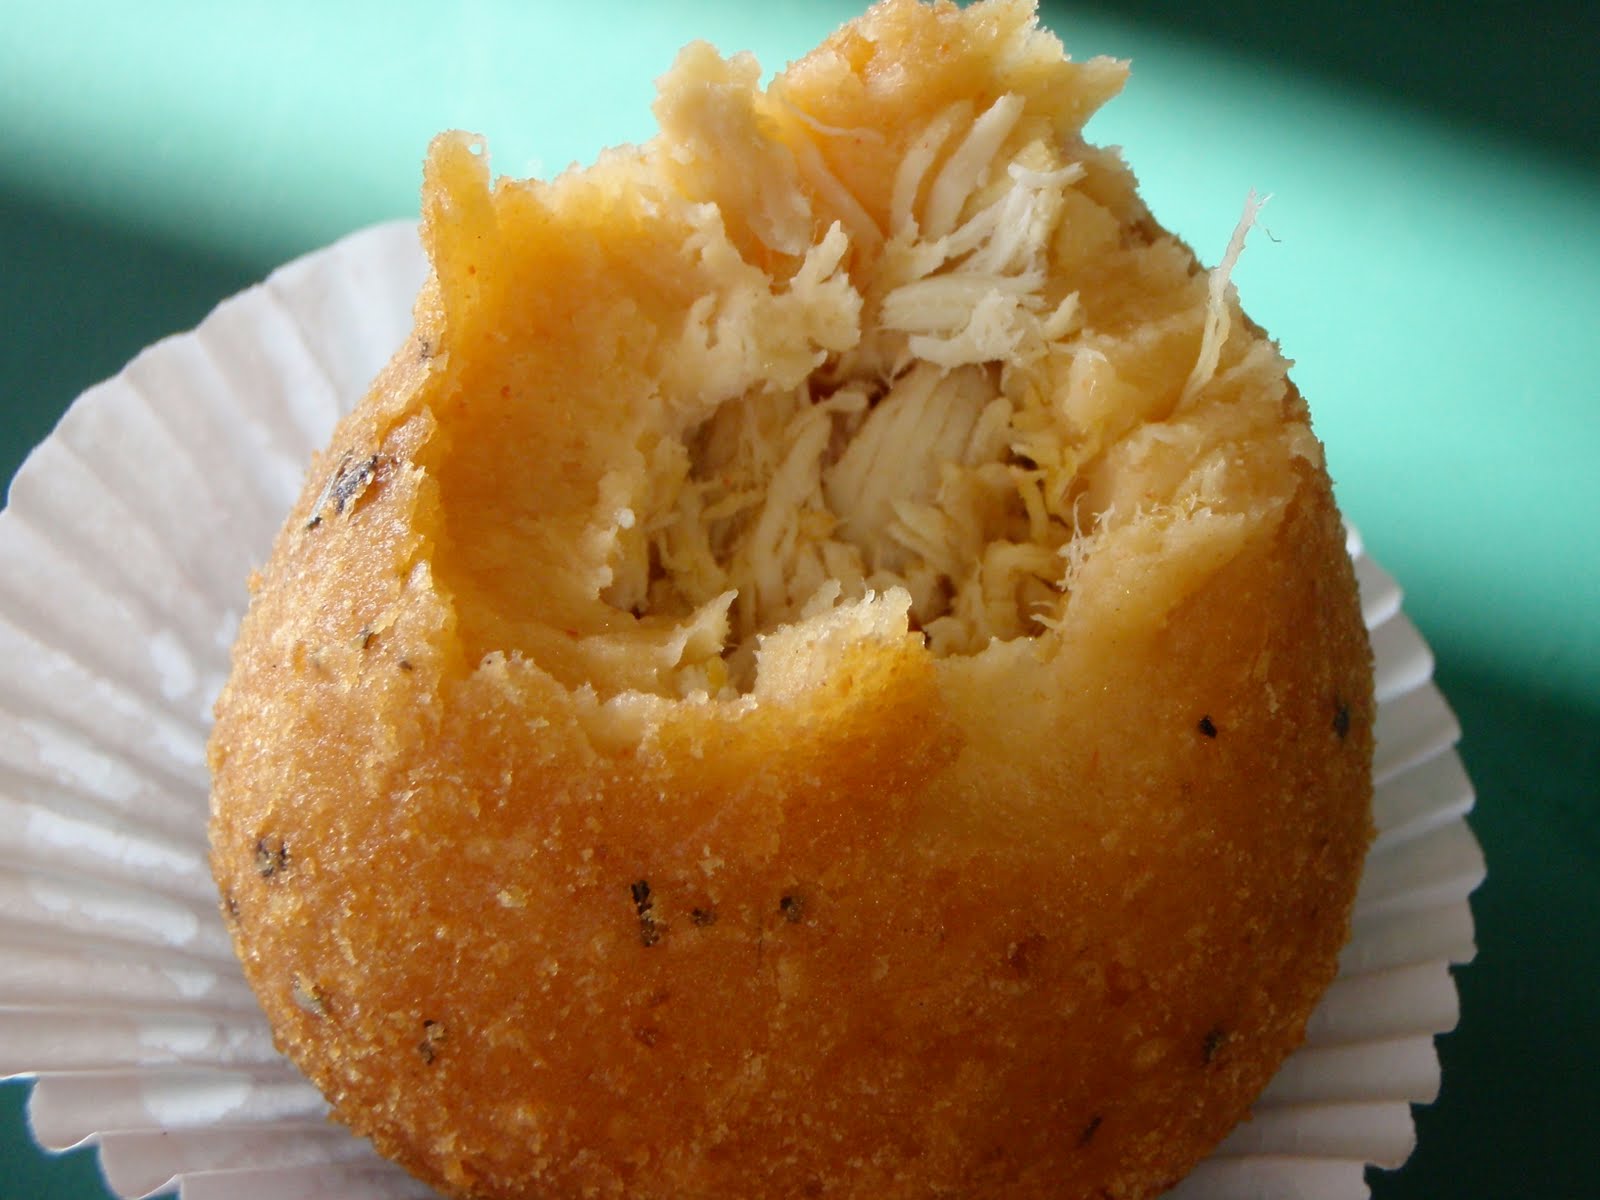
Finally, one other food item I promised to try was a Coxinha. These were everywhere, sold in small shops, bakeries, and some restaurants. Some were the size of a quarter, but most were about the size of a tennis ball. I finally tried one on the last days of the trip. We were in Salvador, and it was a very hot afternoon, so I washed my coxinha down with a cold beer. (The beer was terrible, by the way.) The coxinha was served hot and freshly baked/fried (I'm unsure, it tasted lightly fried.) It was intimidating to tackle: it's bigger than it looks in the picture, and appeared to be a large, teardrop shaped lump of fried yucca flour. But I was committed, so I bit into it. The outermost layer was crisp and flavorful, but the inner layer of the dough was more mushy in texture (it's yucca flour, I guess that's how it tastes?). However, the filling, a mixture of chicken, herbs, and catupirhy cheese (like a strongly flavored cream cheese?) was delicious. It made for a very filling snack. Would I make it at home? No. However, I think this is the sort of product that Trader Joe's should sell in it's frozen appetizer section, and think it would do well sold alongside the spanikopita, cheese and onion tarts, and mini spring rolls. If I were a Brazilian watching the Super Bowl, I'd eat a lot of coxinhas.
In general, Brazil's food was good, if not always mind blowing. The main thing that I ate daily and thoroughly enjoyed (besides the caipirinhas and the coconuts) was something called 'acai na tigela', which, unfortunately, I don't have a picture of. Acai is quickly becoming the new 'trendy' fruit in higher-end American grocery stores, but in Brazil it's a regular breakfast item- the purple acai fruit (it comes from a type of palm tree) is blended with sugar and ice, the put in a bowl and topped with sliced bananas and granola. It is one of the most refreshing and delicious breakfasts that I can imagine. However, while in Brazil a large bowl of this concoction would cost about $2.50-$3, in the states an equivalent amount of acai would likely cost well over $25. Unfortunate, because it is wonderful!
As mentioned earlier, our new pasta maker came right before I left, and we have a big date night planned for Saturday at which we'll be making our first batch of pasta! I'll be sure to blog about that, as well as the hot sauce that I'm excited to make! Cheers!
To begin-if you think the picture above looks like any old grocery store aisle, you're wrong. This photo was taken in one of the biggest grocery stores I've ever been in (some employees wore roller skates to get around faster), and this aisle, both sides, was the yogurt drinks aisle. Not yogurt tubs, squeezables, drinks, and single serve cups, just drinks. It was mind boggling. (I dislike yogurt so I didn't buy any, but was astounded at the selection so I had to snap a picture.)
As promised, I tried the Brazilian national dish, feijoada. This dish is a stew made of assorted animals and animal parts, beans, cilantro, and mysterious lumps, served atop rice. Kyle (my traveling buddy) is fluent in Portuguese, and asked the waiter what was in the feijoada. The response was a longish list of animal bits, including tripe. Kyle translated the list back to me, but left the English word for tripe off the list. (Don't worry, I heard it.) I scooped a selection of lumps out of the sauce- beef (I think), pork sausage (I think), but no tripe (which is wobbly and slightly hairy.) The taste was wonderful- spicy and tomatoey and zesty and rich, but a few bites were enough. I would not make this at home, but I did like the homemade hot sauce that came with it and hope to make my homemade hot sauce sometime this week.
Caipirinhas! (Cai-purr-een-yah) The picture above isn't a caipirinha, but rather, homemade cachaca, which is the sugar cane alcohol that is part of a caipirinha. Several bars sold cachaca that was infused with local flavors: vanilla, corn, ginger, cloves, and you could buy a 'dose' (shot) of the alcohol to sip at. I really, really loved the caipirinhas, which were available at every restaurant for affordable prices and were sweet (sugar) and tangy (lime) and simple and refreshing. I have a bottle of plain cachaca and plan to make homemade caipirinhas as the weather warms up, and I brought back some homemade cachaca from "O Cravinho" Bar in Salvador, Brazil that's infused with clove, lime, honey, and ginger -Yum!!
We spent a lot of time on the beaches at Itacare for my third week, surfing, watching the waves, and not doing anything remotely related to school. The beaches were wonderful- clean, white sand, clear water, and a plethora of vendors selling everything from water, coconuts, sarongs and jewelry to coconut cupcakes, beer, fried pastry, and grilled cheese! The cheese is a local cow's milk cheese and looks a lot like feta, but is chewier. It's skewered on a stick, and the vendors (I really liked the vendor in the picture- he was friendly and gave me a thumbs up every time I saw him) grill the skewer over a tiny handmade coal stove that they carry around the hot beach all day. The cheese somehow doesn't drip off or melt, it just turns brown and crispy on the outside and chewy and flavorful on the inside. At the end, the cheese-vendor dips the skewer into a bag of dried oregano and then grills the cheese one last minute. It's a surprisingly satisfying snack!
Finally, one other food item I promised to try was a Coxinha. These were everywhere, sold in small shops, bakeries, and some restaurants. Some were the size of a quarter, but most were about the size of a tennis ball. I finally tried one on the last days of the trip. We were in Salvador, and it was a very hot afternoon, so I washed my coxinha down with a cold beer. (The beer was terrible, by the way.) The coxinha was served hot and freshly baked/fried (I'm unsure, it tasted lightly fried.) It was intimidating to tackle: it's bigger than it looks in the picture, and appeared to be a large, teardrop shaped lump of fried yucca flour. But I was committed, so I bit into it. The outermost layer was crisp and flavorful, but the inner layer of the dough was more mushy in texture (it's yucca flour, I guess that's how it tastes?). However, the filling, a mixture of chicken, herbs, and catupirhy cheese (like a strongly flavored cream cheese?) was delicious. It made for a very filling snack. Would I make it at home? No. However, I think this is the sort of product that Trader Joe's should sell in it's frozen appetizer section, and think it would do well sold alongside the spanikopita, cheese and onion tarts, and mini spring rolls. If I were a Brazilian watching the Super Bowl, I'd eat a lot of coxinhas.
In general, Brazil's food was good, if not always mind blowing. The main thing that I ate daily and thoroughly enjoyed (besides the caipirinhas and the coconuts) was something called 'acai na tigela', which, unfortunately, I don't have a picture of. Acai is quickly becoming the new 'trendy' fruit in higher-end American grocery stores, but in Brazil it's a regular breakfast item- the purple acai fruit (it comes from a type of palm tree) is blended with sugar and ice, the put in a bowl and topped with sliced bananas and granola. It is one of the most refreshing and delicious breakfasts that I can imagine. However, while in Brazil a large bowl of this concoction would cost about $2.50-$3, in the states an equivalent amount of acai would likely cost well over $25. Unfortunate, because it is wonderful!
As mentioned earlier, our new pasta maker came right before I left, and we have a big date night planned for Saturday at which we'll be making our first batch of pasta! I'll be sure to blog about that, as well as the hot sauce that I'm excited to make! Cheers!
Subscribe to:
Posts (Atom)